Colleagues is getting a refreshed interface, along with several improvements to everyday tasks. This update includes an upgrade from Backpack 6 to Backpack 7, the software behind many of our screens, and changes made specifically for Colleagues.
You do not need to install anything. The changes will be available when you next use Colleagues after the update. Available pages and actions will continue to depend on your access permissions, so you may not see every feature described below.
A refreshed look and easier navigation
The updated interface uses a new visual theme. You will notice changes to fonts, icons, buttons, tables, tabs, and spacing. Familiar tasks such as finding a colleague, editing a record, and viewing your profile remain available, even where the controls look different.
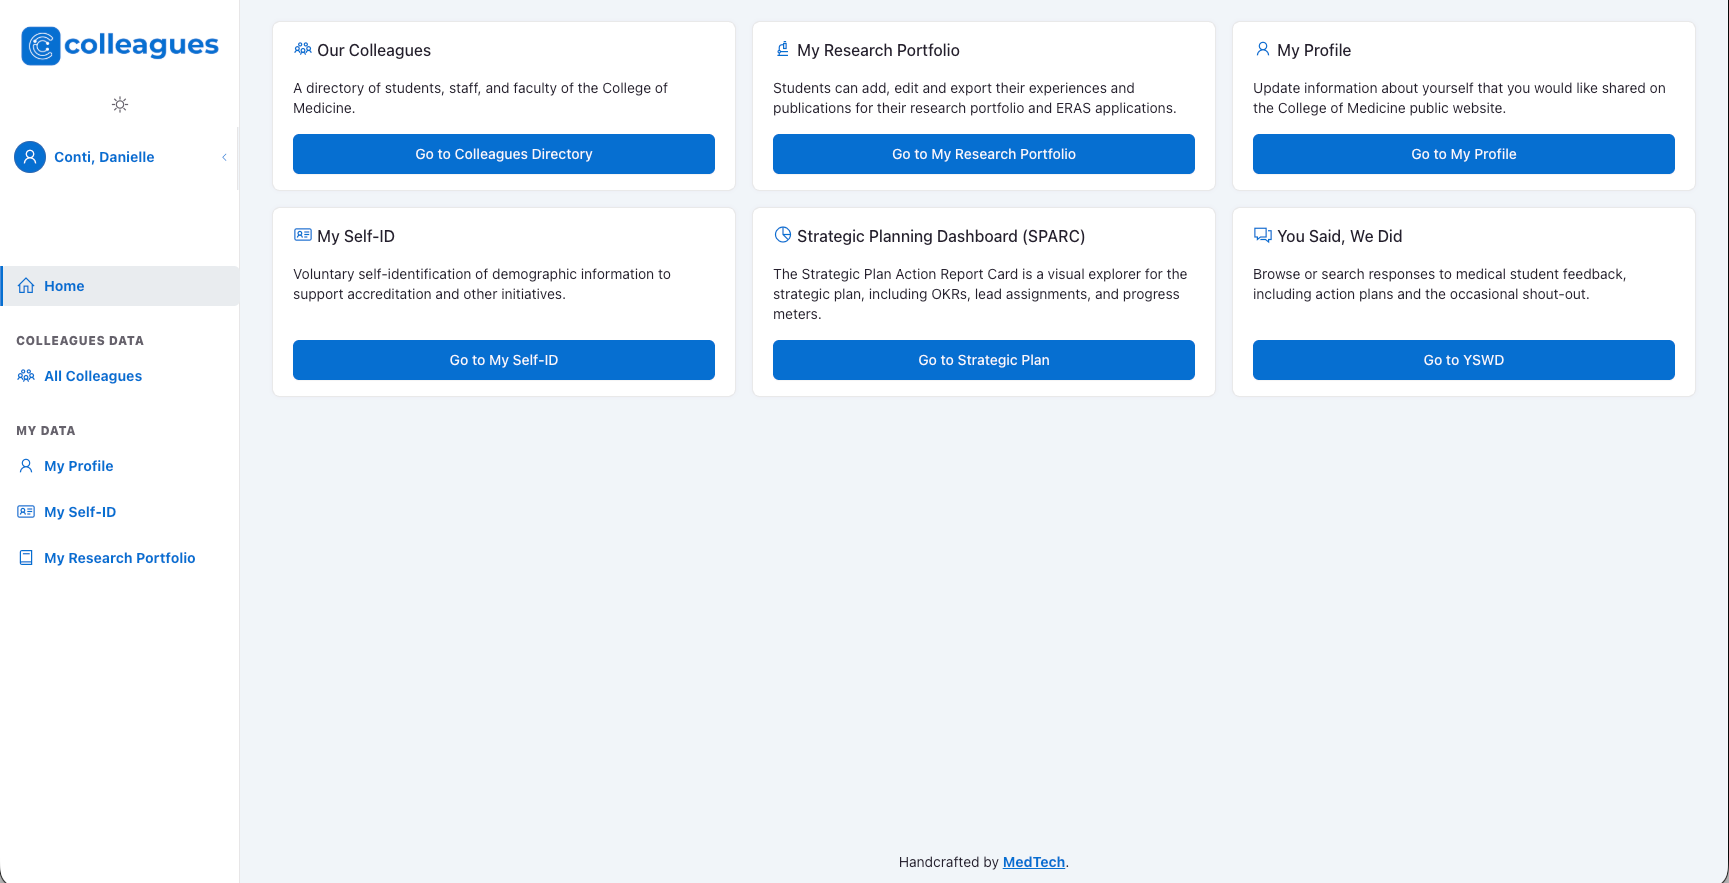
A refreshed Home page
Cards provide descriptions and direct links to tools such as the Colleagues Directory, My Profile, My Self-ID, My Research Portfolio, and My Professional Development, as applicable to your account.
Clearer sidebar organization
Navigation is grouped into sections such as Learner Data, Colleagues Data, Campus Data, and My Data. Expandable menus keep related tools together.
A visible current-page indicator
The sidebar highlights the page you are using, including items inside expanded menus.
Updated action icons
Icons have a more consistent appearance. On lists such as Learners and Research Meetings, hover over a quick-action icon to see what it does.
Light and Dark Mode
You can use the appearance switcher to choose Light, Dark, or System mode. System mode follows your device’s appearance preference and is the default. The switcher is located in the left-hand navigation above your user name.
We have also adjusted text contrast, dropdowns, tabs, and disabled buttons to make them easier to distinguish in both light and dark mode.
See and remove active filters

On record lists with supported filters, your selected filter values now appear as small, removable badges below the filter bar. You can now remove filters individually by clicking the x button on the filter badge or remove all with remove filters. These badges make it easier to see why a list is showing only certain records, without reopening every filter.
- Choose a filter and select a value.
- Look below the filter bar to review your active selections.
- Use a badge’s remove control to remove that selection and refresh the results.
If a record seems to be missing, check the active filter badges and the search box before assuming it is not in the system. Removing a filter does not delete any records.
My Professional Development

The top of My Professional Development has been reorganized to give your training list more room.
- Your Contributor Points Balance appears in a summary card.
- Learn about the Program opens a pop-up with program information, resource links, and contact details.
- How to Export Trainings opens export instructions, including a button that takes you to the export controls.
The training export still uses the visible training records and columns. Apply your filters and choose the columns you want before exporting. If you need more records than the current page displays, use the entries-per-page control; the page’s instructions explain when to select All (Export).
Research Portfolio: an organized Excel export
Export Research Portfolio now downloads an Excel workbook rather than the previous CSV-style export.
The workbook separates your information into three worksheets:
- Experiences
- Publications
- Impactful Experiences
Save your portfolio before exporting. The download uses your saved information, not unsaved changes in the form.
Learner administration: leave-of-absence updates
For staff with the appropriate access, the Student Affairs tab in a Learner record now provides more direct access to leave-of-absence information.
Update an existing active LOA
When the learner has exactly one active LOA, the form displays LOA Return Year and LOA Return Term. You can update these values and save the Learner form without opening the separate LOA record.
Create an LOA from the Learner record
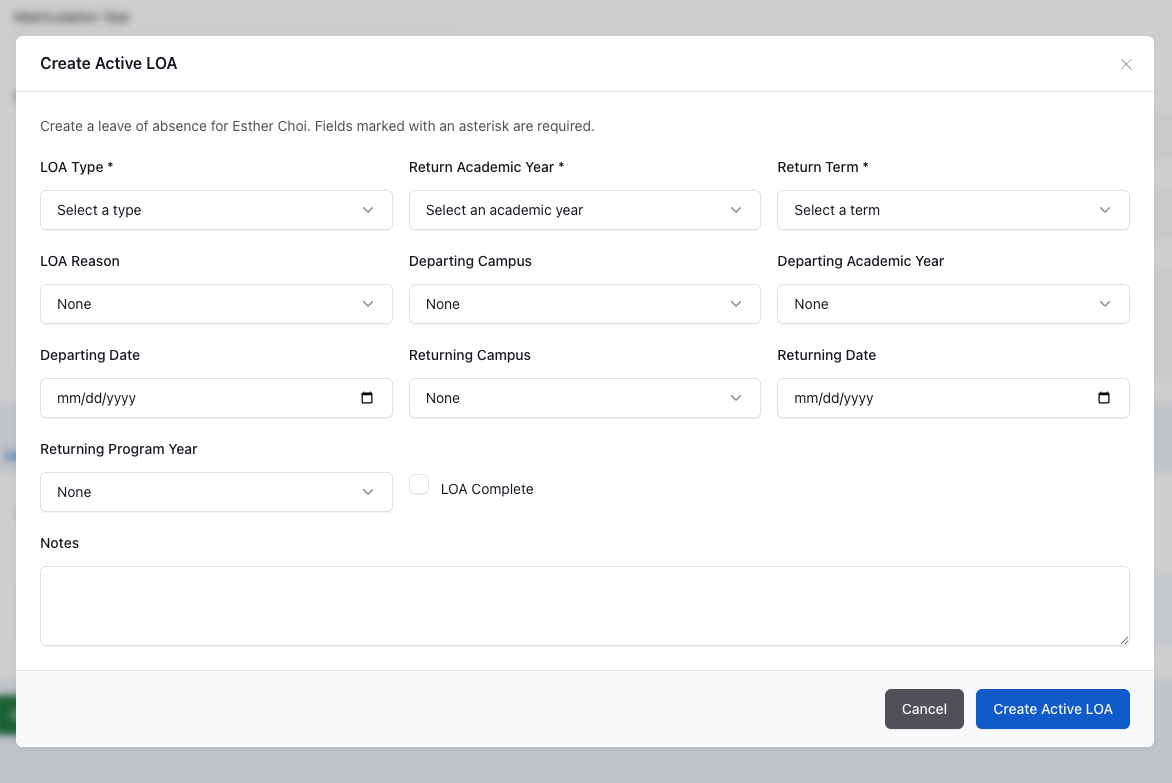
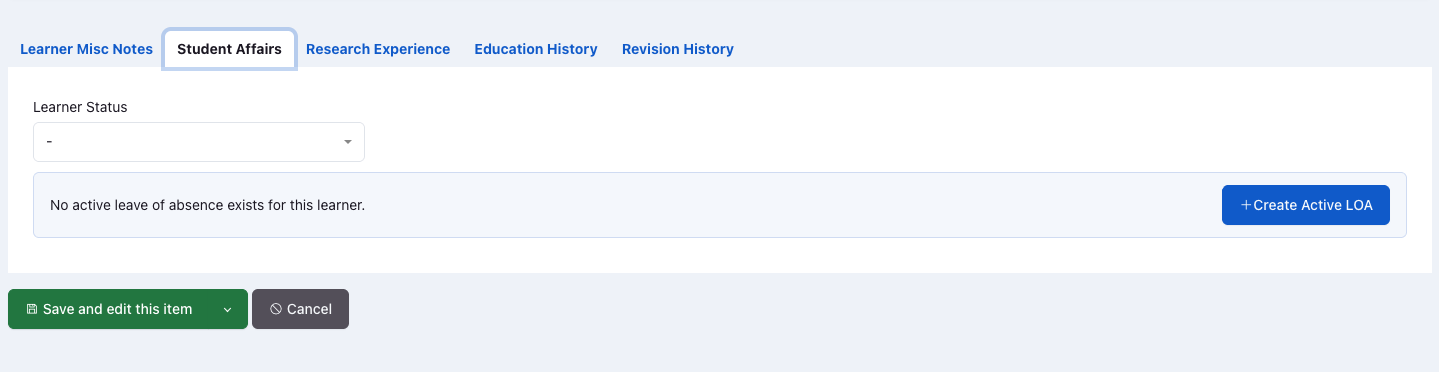
When there is no active LOA, authorized LOA administrators will see Create Active LOA. This opens a pop-up where you can enter the leave details.
The required selections are:
- LOA Type
- Return Academic Year
- Return Term
The pop-up also provides fields for departure and return details, the reason for the leave, and notes.
Save any other Learner edits before creating an LOA. Creating the LOA refreshes the page. Simply changing a learner’s status or saving the Learner form does not automatically create an LOA; use the dedicated action
Clearer handling of active LOAs
- Completed LOAs are excluded from the active-LOA information.
- If a learner has multiple active LOAs, a warning directs you to the LOA list to resolve them before updating return information.
- For learners whose status is LOA, the learner export now includes both the anticipated return term and academic year, when available.
Clearer forms and other improvements
Several administrative forms now identify required fields more clearly and check entries when you save. For example, training records require a Topic, Training Date, and Training Type. If required information is missing, complete the indicated fields and save again.
Other changes include:
- Improvements to keyboard focus indicators, field labels, and screen-reader descriptions
- More consistent styling for list actions, status badges, and dropdowns.
- Removal of the old preview control from the administrative Colleague Profile form. Profile editing remains available.
Getting started after the update
1. Open Home or use the sidebar to find your usual tools.
2. Choose your preferred light or dark appearance.
3. Check the new filter badges when working with lists.
4. Review the sections above that apply to your work.
If something does not look or work as expected, report the page you were using, the action you were trying to complete, and any error message. Avoid including sensitive colleague or learner information in screenshots. Please submit complete write up with screenshot to medicine.tech@wsu.edu.