Large-group sessions are typically recorded because students find these videos beneficial when trying to learn complex material. With the recording, students can listen at 2x speed, pause to research, back up to re-listen to a portion of the video, and take notes as they go! When students are unable to attend a class, they use these videos as a backup. Faculty can reuse session recordings in case an emergency prevents them from delivering a scheduled session.
Can you tell we session recordings?
No Recordings: Patients and Sensitive Topics
When patients are present, we do not record sessions (or portions of sessions). As soon as you have identified that a patient or guest will attend and share sensitive information, please contact the Curriculum and Education Technology units, so we can plan accordingly.
This also applies to sensitive discussions where students are asked to contribute personal information.
Session Videos in Panopto
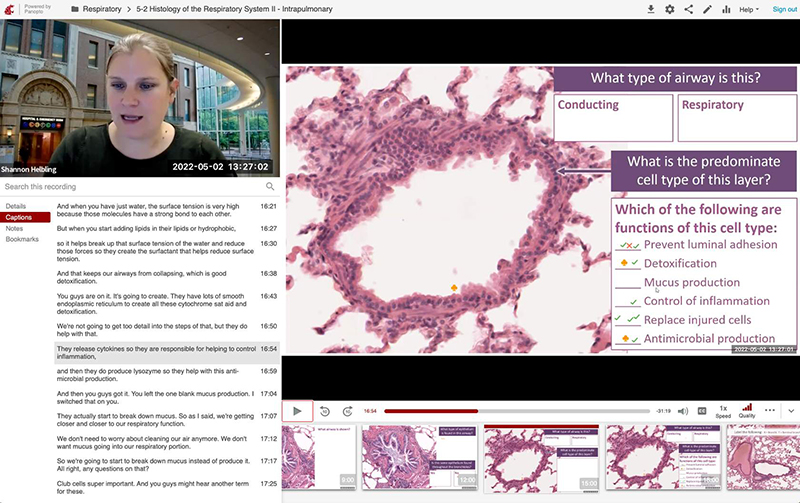
Any material that is presented on the computer will be the main focus of the video. You’ll notice in the image that the instructor (or classroom) is visible in the top left corner. If the instructor is doing a visual demonstration, viewers can swap these two screens!
Session recordings include captions with time stamps, thumbnails for visually navigating through the video, and options to download the video for watching later or increasing the video speed to watch at a faster rate.
For more step-by-step instructions on accessing and viewing recordings, check out Session Videos in Panopto.
Find a Session Recording
Session recordings are always posted to their respective session in E.Flo MD and will be available by the end of the day. It takes time for our team to process the video. If you can’t find a recording that should be present, please let us know!
Maximize Your Presentation for Video
Best Practices for Teaching In Person
The lapel microphone provides consistent audio for the video recording.
Try not to turn your back on the camera!
Repeating the questions and answers for the video recording provides information students need when studying.
An actual laser pointer is not easily seen in the classroom and is completely invisible in the session recording. MedTech can show you how to use the built-in laser pointer feature in PowerPoint!
Check out this blog post: Get to the laser point
Instead of using a physical whiteboard, use a digital whiteboard, so your content is clearly captured in the session recording.
Best Practices for Teaching Remotely
Before your session begins, it is a good idea to test your equipment, audio, and video. This usually takes about 5–10 minutes.
Have your webcam turned on and angled to capture your entire face. Check out these Zoom Best Practices.
Students ask questions in the chat. Be sure to read the questions out loud before answering them, so the question as well as the answer are captured in the session recording.
Need a quiet space to create a session recording? Reserve our Teaching Studio.