
What is Bookings?
Microsoft Bookings is a tool to create and manage appointments or meetings. Through a booking page: A webpage that allows students, staff, and faculty to schedule an appointment or meeting. Create an Individual bookings page to schedule 1:1 appointments, or create Team bookings pages that allow users to schedule appointments or meetings with different members of your team depending on their need.
In order to get access to Microsoft Bookings, you will need to request access from Spokane Information Technology Services.
Get Started
Once you have access to the Bookings app, you can access it on your Bookings Homepage. You will need to be logged into Microsoft 365 using your WSU credentials. On your Bookings homepage, find the link to your personal Booking page.
Public Meeting Booking Pages
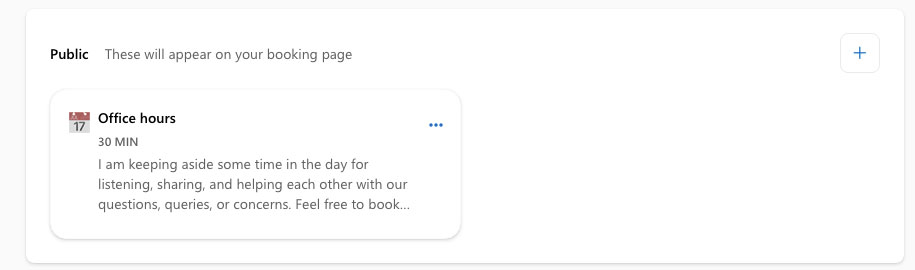
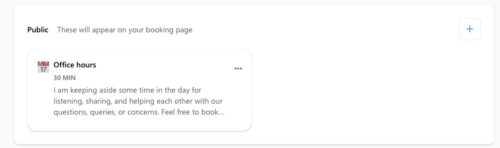
By default, there is an Office hours booking page in the public section. Delete this by clicking the Three dots and selecting Delete. Click the Plus + sign to create a new Booking page. Any Booking page in this section will be public.
Private Meeting Booking Pages
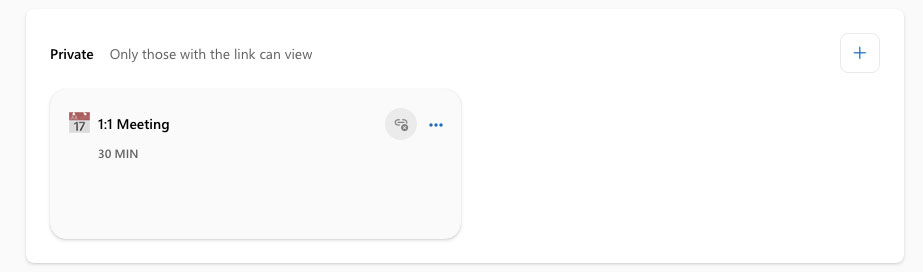
By default, there aren’t any Booking pages in the Private section (the image above shows how a booking page will display under the Private section). Booking pages added to this section will only be accessible if you share the link with another individual. Create new booking pages in this section by clicking the Plus + sign.
Create a Booking Page
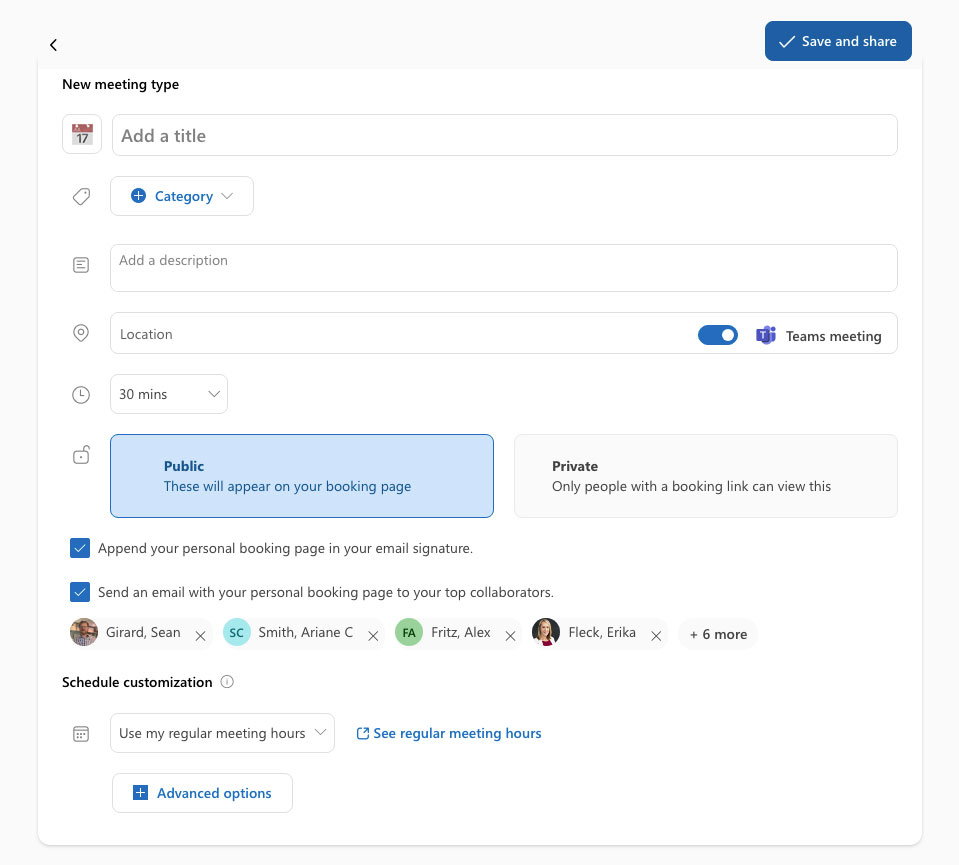
To create a new booking page, click the Plus + button in the Public or Private container. Fill in the following details for your bookings page:
-
Title
-
Category (you can create categories by clicking the dropdown and selecting new category)
-
Description
-
Location, you can add your office number or add a Teams meeting
-
appointment/meeting duration
-
set the booking page to public or private
-
set your availability
Advanced Options
Customize your meeting/appointment slots with the following options:
-
Buffer times: Add time before or after appointment/meeting.
-
Limit start times: For example, 30-minute intervals would allow users to schedule on the hour or half hour.
-
Minimum lead time: Limits how close a user can schedule a meeting. For example, if you have a one-hour lead time, they have to schedule an hour before their appointment/meeting.
-
Maximum lead time: Limits how far out a user can schedule an appointment/meeting.
-
Email reminders: Send an automated email to the user to remind them of their upcoming appointment/meeting scheduled with you.
-
Email follow-up: Sends an email after your appointment/meeting to collect feedback about the appointment/meeting.
Save your Bookings Page
After you have filled out the all the required details for your Bookings page, save your page by clicking the Blue button in the top right-hand corner.
Share a Bookings Page
To share a Bookings page, click the Three dots on the Booking page card. Copy the link or share.
Edit a Bookings Page
To edit a Bookings page, click on the Card, and it will open the form used to create the page. Change the information that needs to be updated and click Save.