Sharing Content in SharePoint

Our Technology SharePoint Sharing Content in SharePoint

Table of Contents

5-min read

SharePoint is designed to be a collaborative platform that allows for secure and easy sharing between those who should have access to a document or file. This creates some incredibly useful opportunities for sharing and collaborating your content.

Should This File Be on OneDrive, SharePoint, or Teams?

Microsoft has several solutions for file sharing and collaboration—OneDrive, SharePoint, and Teams. All of these are OneDrive.

  • OneDrive is a cloud-based storage solution.
  • SharePoint is a user interface and organizational tool for collaborating in stored files.
  • Teams is a messaging platform with the option to create groups with a private SharePoint Site.

If you store files in Teams, you are putting them in the document Library on the attached SharePoint Site, which stores these files on OneDrive. Clear as mud, right? 

When Should I Store a File on OneDrive?

Your WSU OneDrive is for your documents and files. If you own and are responsible for editing, updating, or maintaining the file, then save it on your OneDrive, and use the sharing options described below to control access to that file.

Think about it this way: Is this my document (put it on OneDrive), or is this our document (put it on SharePoint)?

Your WSU OneDrive is owned by WSU and is fully accessible even if you leave. There is no chance that files stored on your OneDrive will be lost. The location can be reassigned to a new person by a request to Campus IT.

How Do I Share Content from OneDrive or SharePoint?

To share content, locate the Share icon . The options for sharing, as well as the configuration of the share link, are the same whether you share from SharePoint, a file from OneDrive, or a link in Outlook—master this, and you’ll master them all!

When you share a file or Site, you give permission for someone to access that file or Site. If you click the Share icon in the top right corner of your Site, you are granting access to the Site and anything that inherits permissions from that Site, which could include most of the Site’s content. If you hover over a file in a Library, the Share icon appears to the right of the file name.

While you can share a link to a folder, it’s not possible to share a folder that provides access to someone who doesn’t already have permission.

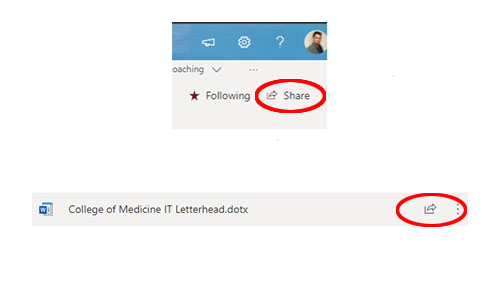
Configure Your Share Options

When you click the Share button , you will see a popup that looks like this:

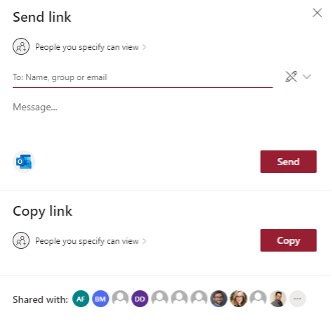
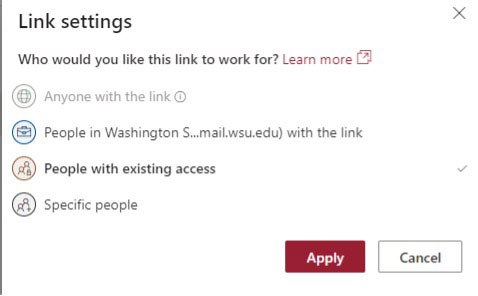
This window allows you to set specific rules on the link. The default setting creates a link that only works for the people you specify.

You have the ability to decide who gets the link and whether they can edit and/or download the document. You can also see who has access to this file.

  1. Click the Share icon .
  2. Make sure the Link type is set to People you specify can view.
  3. Look up each person by name, group, or email.
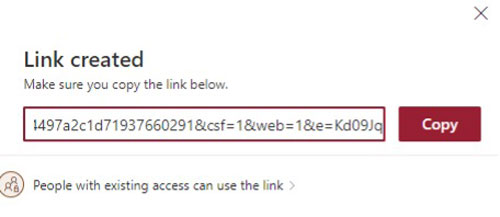
  4. Then, click Send to email them directly, or click Copy and Paste it in an email, Teams/Slack message, Word document, or wherever you need to share this link.

  1. Click Share icon .
  2. Make sure the Link type is set to People in Washington State . . . .
  3. Check the box for Allow editing (if applicable).
  4. Click on Block download (if applicable).
  5. Click Apply.
  6. Then, either add names and emails of people to email this link. Then, hit Send or Copy the link and Paste it elsewhere for distribution.

If you want to link to a file but not grant new access or help someone find a file they already have access to . . .

  1. Click the Share icon .
  2. Make sure the Link type is set to People with existing access.
  3. Click Apply.
  4. Then, add names and emails of people to email this link and hit Send, or Copy the link and Paste it elsewhere for distribution.

If that seems like a lot, there an easier way.

If you want to quickly get a link without the fine-tuning controls, Right Click or use keyboard shortcuts (  Control+Click or Alt+Click) on a file. Then, click Copy link. Choose to change the Link type or not. By default, this does not create new access and is a great way to share a file among a group who has access to that file.

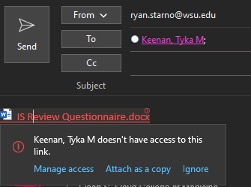
When you Paste a SharePoint or OneDrive link into an Outlook message, you can update the settings from within the email window.

The link will turn red if someone that you are emailing does not have the access required to view this link. This will also present you with options to change the link or attach a copy of the file to the email.

Collaboration Station

You might be thinking to yourself, “Ace, you sure use this collaboration word a lot—do you even know what it means?” To that I say: a very strong maybe.

When a file is located in OneDrive and SharePoint, multiple users can access and edit this file simultaneously. If you are in a file at the same time as someone else, you will see their initials appear in the top-right corner of the screen.

There is a short delay between the time when someone makes a change and when you see that change. With the ability to see who is in a file and where they are, you can avoid conflicts by working on different parts of a file or document.

SharePoint Permissions

Generally, if you need access to something in SharePoint, reach out to the department or team who owns the resource, and their Site Admin will grant you access. In SharePoint, there are three basic levels of access:

Permissions should only be set at the Site or Library level. Changing permissions on individual files impacts the security of your Site.

Keep Learning