VisualDX

Our Technology VisualDX

Table of Contents

10-min read

What Is VisualDx?

VisualDx is an extensive library of medical images with a variety of skin tones. The library has a Smart search feature to find related images for chief complaints, diagnoses, and drug reactions. This search feature allows a lot of flexibility to search for images and information to suit the need or situation. There is also a Skin of Color filter to search for images of darker skin tones or all skin tones. 

Access VisualDx

You will need to create a password for this resource. It is not your WSU password. 

If you already have a VisualDx account, use the button to Log In.  

If you do not have a VisualDX account, contact MedTech to request one.  

Use VisualDx

Find Images

visualdx-search-images-image

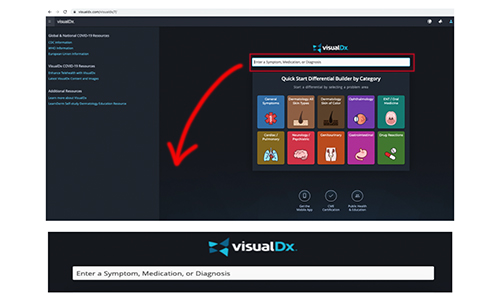
Use the search bar if you have an exact symptom, medication, or diagnosis to find.  

visualdx-browse-images-image

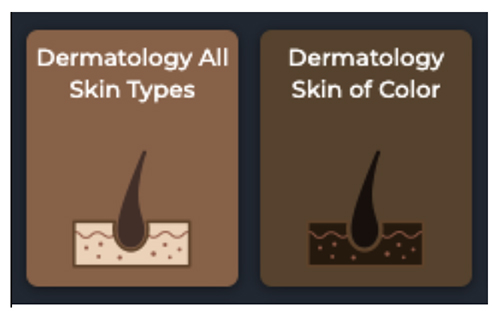
You can also browse for images by clicking on a Category, such as one of the Dermatology panes. Then, narrow the differential for all skin types or skin of color.

visualdx-viewed-differential-image

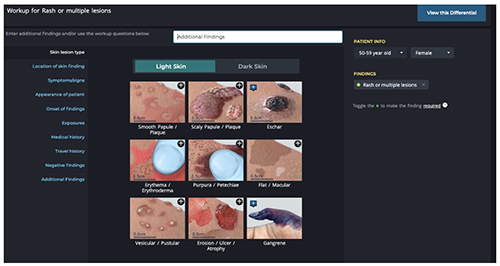
Use the column on the left side of the screen to Enter various findings, like skin lesion type, location, symptoms, and history.

On the right side of the screen, Adjust information about the patient, including age and gender. When ready, select View this Differential.

visualdx-filter-images-image

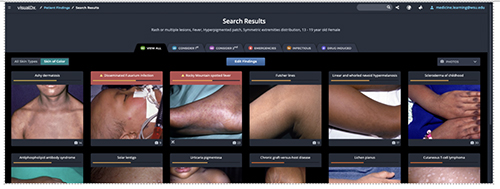
Filter your search results based on what order they should be considered in, emergencies, infectious, or drug-induced.

visualdx-diagnosis-image

visualdx-filter-skin-color-image

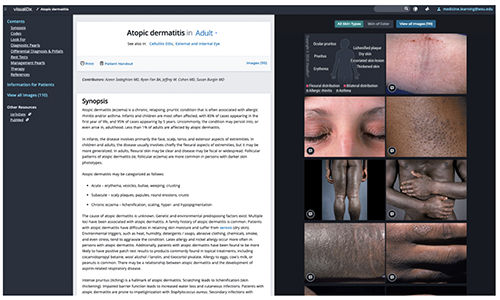
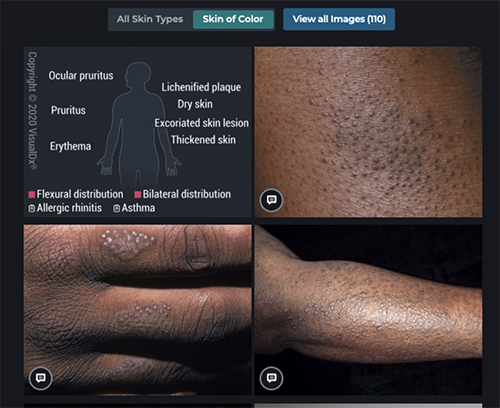
Choose a diagnosis to view a page with a Synopsis of the Condition, as well as images that can be filtered to Skin of Color.

Save Images

Any image can be saved to your computer and placed into a presentation or used as reference for students. You can save any image by right-clicking on the image and selecting Save Image As. The image will be watermarked so it is clearly attributed to VisualDx.

  1. To insert the image into a PowerPoint presentation, select Insert from the Menu.
  1. Then, select Pictures and choose Picture from File.
  1. Locate the image you saved to your desktop.
  1. Select the image and click Insert. Now, it will be on your PowerPoint slide, and ready to position and edit.

For extra magic, drag and drop the saved image file into your PowerPoint!

Related Reading