Upload Content

Our Technology E.Flo MD Upload Content

Table of Contents

5-min read

What Is Event Content?

Learning Event content includes the abstract, required preparation, and event resources such as links and files.

When Should Content Be Added to the Session?

Upload your content as soon as possible! Students look through future events to estimate their workload. At the very latest, submit your content by the Friday before your session. Many students use the weekend to prepare for the following week.

How Do I Edit Event Content?

  1. Navigate to the session you would like to edit. Use a direct link, or access the event you’re teaching through your E.Flo MD dashboard calendar.
  1. In the left sidebar under Display Style, select Teacher View (or it may say Director View). The term will vary based on your role, but both roles are able to edit event content.
  1. Add any required preparation details or additional context, such as suggested reading.
  1. To add a link or upload a file, scroll down to the bottom of the page. Click the green Add a Resource button. Then, follow the prompts.

Resource Wizard

First, choose whether the resource is a file or link. Depending on your selection, you’ll receive different prompts later in the upload process.

Mark whether this resource is Optional or Required for students to use. If you mark that it’s Required, be sure to include how much time students should spend on that resource. 

When should a student use this resource? Most resources are best used before, during, or after class. Try to avoid the no timeframe option unless that really is the best description for the use of this resource!

Make sure you complete this field for all required resources! If you’re not sure how long it will take students to use the resource, use the Resource Time Calculator.

You can set a resource to be available before, during, or after a specific date and time. 

If you have special activities during your class presentation that you don’t want students to see ahead of time, use a time release. We recommend that you release these presentations ten minutes before a session starts—it gives students enough time to download and import the slides into their favorite note-taking application, but not long enough for them to work ahead!

Hiding a resource from students still allows that resource to be accessed by faculty. 

For resources to be visible for students, you must click Publish. If you like to upload a draft while working on a resource, beware: It’s easy to forget to publish that draft! 

How do you want people to view this file?

We recommend leaving the default selected! This question doesn’t impact students. 

Provide a descriptive title for your file.

Be sure to provide a descriptive title so students know what it is!

You may want to provide a description for this file as well.

Adding a description is optional but helpful for students. 

E.Flo MD (Staging) File Upload Copyright Statement.

When you move to the next step, you agree that you are in compliance with the copyright statement.

Drag and Drop Files.

Click the green button to browse your computer for a file, or drag and drop a file into the Add a Resource window.

That’s the last step! You should receive a confirmation that your resource has been uploaded.

Is this a link to a WSU Library Resource?

Library resources require a special proxy to make them accessible to off-campus students. Select Yes to add this proxy.

Please provide the full URL link.

Paste the link that you want students to access, including the HTTP.

Provide a title for the link.

Provide a descriptive title for the link so students know what the resource is.

You may provide a description for this link.

Adding a description is optional but helpful for students.

That’s it! Click Save Resource, and you’re done!

Edit an Event Resource

Locate the event resource. Note: You may have to select the timeframe that the event belongs to first. Click on the Title of the resource. When the Resource Wizard opens, make any needed changes. Proceed through all questions in the wizard to save your changes. 

Files present an additional option that asks, “Would you like to replace the current file with a new one?”  Select Yes, if you need to upload a new version of the resource file. 

Delete an Event Resource

Click the Trashcan icon next to the resource that you’d like to delete. Then, click Confirm deletion.

Resource Section

Resources that belong to the same timeframe can be grouped together. Click the Folder icon next to a resource. Then, choose Create New Section. Once the section has been created, add other resources.

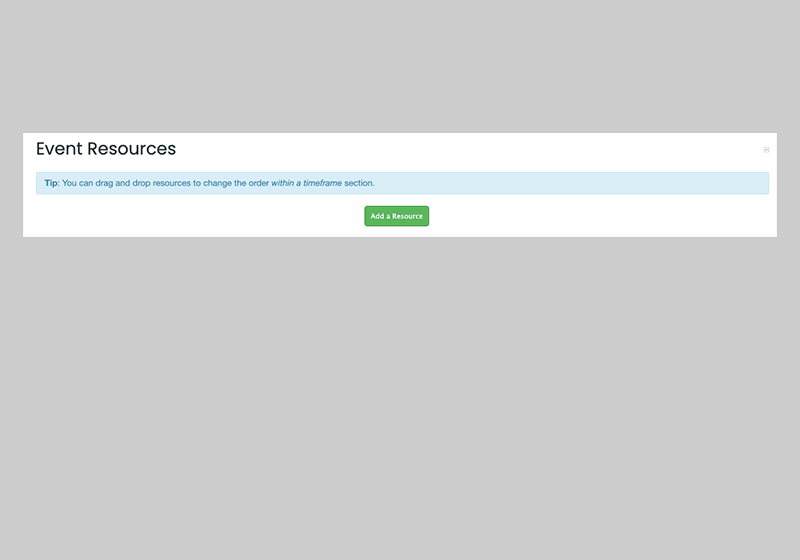
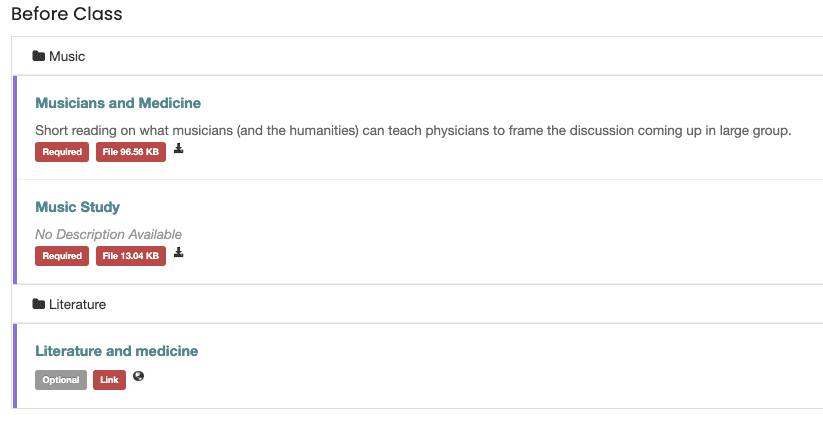
You can rearrange event resources within a timeframe! Simply click on the Resource you’d like to move. Then, drag it up or down and release!

Always provide a PDF version in addition to the Word  or PowerPoint file. Students use PDFs with note-taking apps on their iPad and are unable to import other file types.

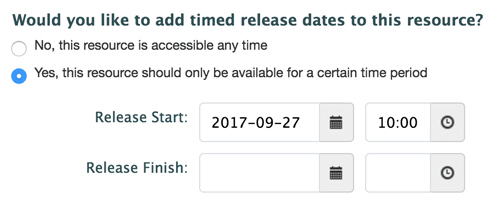
Time Release is an option that prevents student access before or after a specified time. 

eflo-uploaded-content-time-release-image

A specific template is not required, but there are general requirements that must be met to maintain consistency and usability across platforms. Open the PowerPoint template below to see these requirements.

If you feel overwhelmed by this process, we’re here to help! The Education Technology unit provides training to upload resources or uploads resources on your behalf. Reach out to us.

PowerPoint Slide Templates

Our PowerPoint template explains required elements, as well as formatting guidelines and recommendations.

Keep Learning